Facebook Content Calendar: Step-by-Step Setup
If your current social media strategy consists of waking up and asking yourself, "What should I post today?", you are operating at a massive disadvantage.
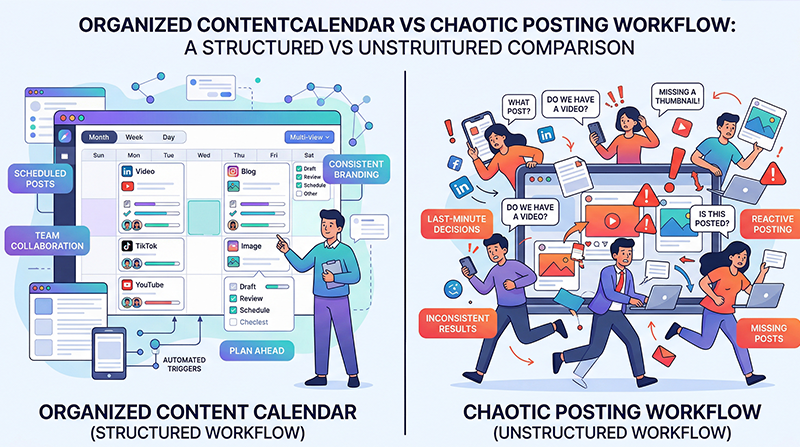
Reactionary posting leads to missed opportunities, inconsistent messaging, and elevated stress. The antidote to this chaos is a structured Facebook Content Calendar. A well-built calendar acts as the central nervous system for your entire marketing strategy, giving you a bird's-eye view of your messaging over the coming weeks and months.
Setting one up might seem daunting, but it doesn't have to be. Follow this step-by-step guide to build a robust, scalable content calendar from scratch.
Step 1: Audit Your Current Assets and Goals
Before you start filling out dates, you need to know what you have to work with and what you are trying to achieve.
First, define your primary objective for the next quarter. Are you driving foot traffic to a local store? Pushing a new e-commerce product line? Or focusing purely on community engagement?
Next, audit what assets you already possess. Do you have a folder of product photography? Three recent blog posts you haven't shared? A video from last year's charity event? Take inventory. Categorizing what you already have prevents you from feeling like you need to create everything from scratch.
Step 2: Establish Your Posting Cadence
How often will you realistically post?
The biggest trap businesses fall into during this setup phase is overcommitting. Deciding to post twice a day when you currently post twice a month will lead to calendar abandonment by week two.
Start conservatively. For most small formatting to medium businesses, aim for 3 to 5 high-quality posts per week. Consistency on three days is significantly better than a burst of seven days followed by two weeks of silence.
Step 3: Map Out the Big "Anchors"
With your cadence decided, open your calendar. Do not start by planning daily posts. Start by plotting out your "Anchors."
Anchors are immovable milestones. These include: - National holidays (Thanksgiving, New Year's Eve) - Major business events (Anniversaries, Product Launches) - Industry-specific dates (e.g., National Coffee Day for a cafe)
By plotting these anchors first, you ensure you never accidentally miss a critical promotional window because you were too focused on the day-to-day posts.
Step 4: Fill the Gaps with Content Pillars
Now that your big events are mapped, you will see the empty gaps in your month. This is where your content pillars come in.
Allocate specific days to specific pillars to ensure variety. A sample week for a fitness coach might look like: - Monday: Educational (A deep dive into protein intake) - Wednesday: Social Proof (A client transformation photo) - Friday: Promotional (A push to sign up for their coaching program)
Assigning a specific theme to each day removes the fatigue of choice. When Wednesday rolls around, you don’t have to wonder what to write about; you simply have to figure out which piece of Social Proof to share.
Step 5: Draft and Batch
A calendar filled with ideas is useless until those ideas are turned into actual copy.
Dedicate a two-hour block to sit down and physically write the captions and source the images for the upcoming two weeks. This is called content batching. Doing this in one sitting ensures your tone remains consistent and is infinitely faster than writing individual posts every single day.
Step 6: Automate the Execution
A calendar drawn on a whiteboard still requires you to manually log into Facebook at 2:00 PM every day to hit publish. This defeats half the purpose of planning.
To truly streamline your workflow, you must migrate your mapped content into a dedicated digital platform. By uploading your batched text and images into a scheduling tool, you automate the execution phase completely. When analyzing the minimal pricing of a reliable software tool, remember that you are not buying software; you are buying back hours of your own time.
Once your calendar is automated, your daily social media tasks shift from "frantically creating" to "passively monitoring and engaging."
Step 7: Review and Refine
At the end of your first month using the calendar, look back. Which days performed best? Did Monday's educational posts flop while Friday's promotional posts soared?
A content calendar isn't set in stone; it is a hypothesis. Use your analytics to prove or disprove what works for your audience. For a more detailed breakdown on interpreting these analytics, check out the resources available on our insights.
---
INTERNAL LINKS USED: - / (home page for platform migration reference) - /pricing (reference highlighting the ROI of software) - /insights (internal link for analytics and review advice)
IMAGE SUGGESTIONS: - Placement: After "Step 3: Map Out the Big Anchors" Description: A visual of a monthly calendar view with 4 or 5 brightly colored "Anchor" events plotted, leaving the rest of the days visibly blank. - Placement: After "Step 6: Automate the Execution" Description: An interface showing a list of posts labeled "Scheduled," highlighting the transition from a manual plan to an automated queue.
CTA: Ready to transform your chaotic posting into an organized strategy? Use our Facebook scheduler to build, visualize, and automate your new content calendar in minutes.